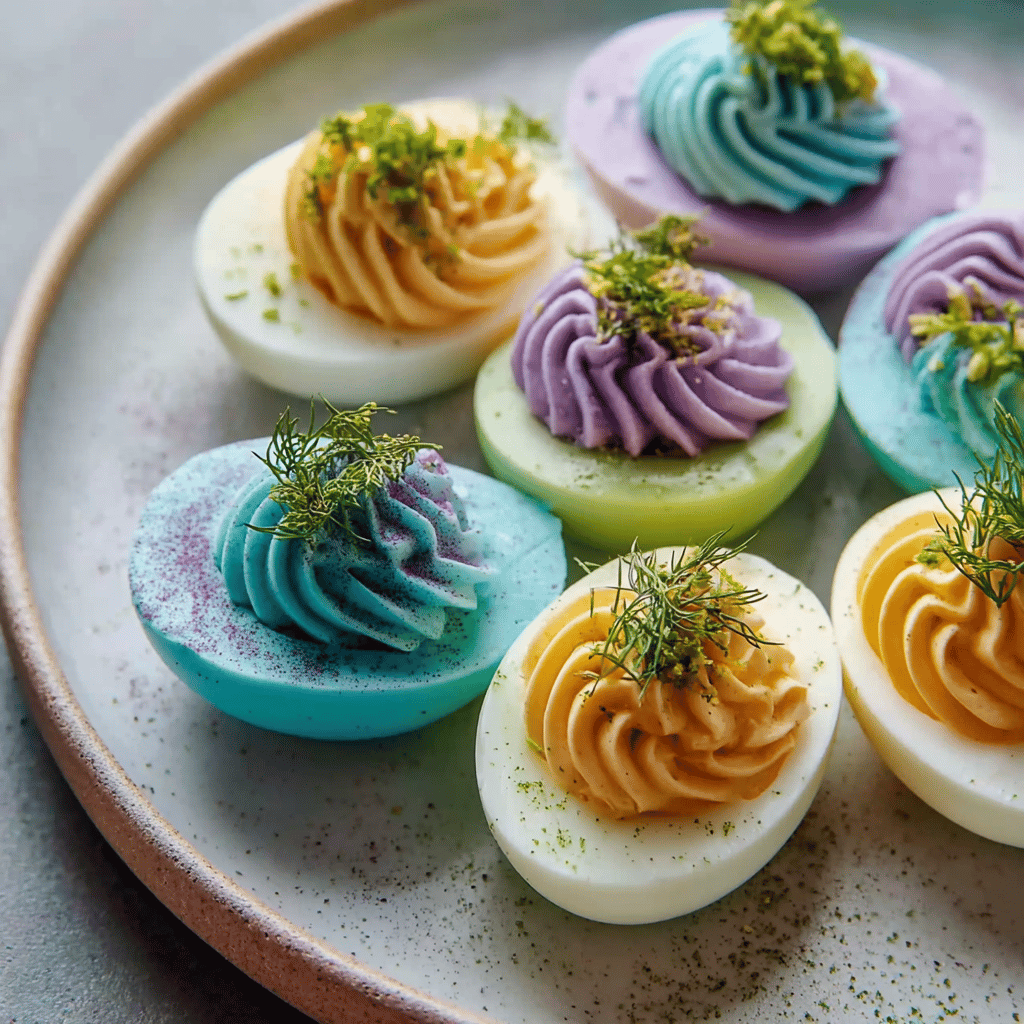
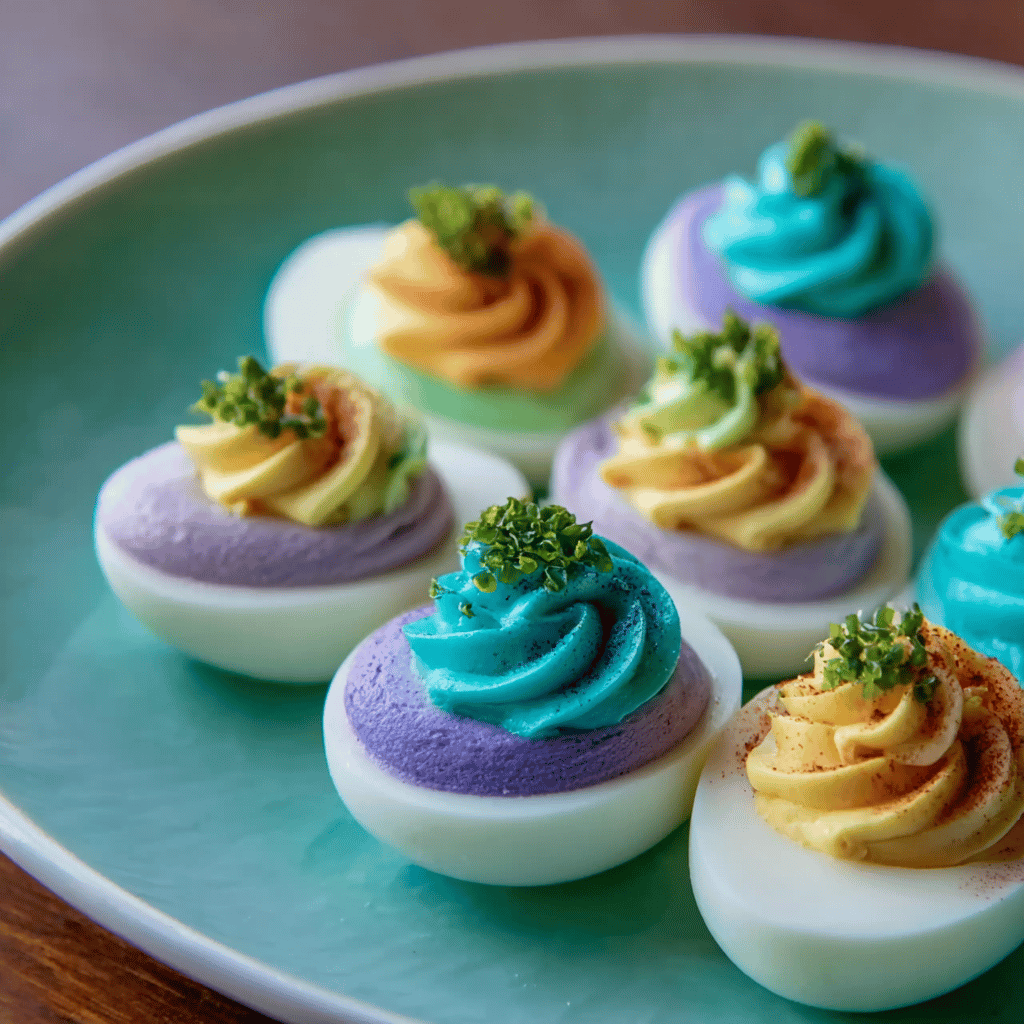
Easter Deviled Eggs Recipe
The first time I tried to make deviled eggs for Easter, I wanted them to be perfect. The eggs would be creamy, the garnishes vibrant, and the presentation flawless. Instead, I ended up peeling off half the whites with the shells and the filling was somehow both runny and lumpy. It was a disaster. My mom, ever the optimist, just chuckled and said, “Honey, it’s not about the eggs being perfect, it’s about the love you put into them.” So, with her words in mind, I’ve perfected a recipe that’s not just about impressing guests, but about creating a delightful, colorful addition to any Easter table.
Now, I get asked to bring my Easter Deviled Eggs to every family gathering. Honestly, they’re a hit with both the kids and adults, and there’s something so satisfying about seeing a platter of these festive little gems get gobbled up. It’s become a tradition, and I’m excited to share it with you!
Table of Contents
Ingredients
Okay, let’s roll up our sleeves and get our ingredients together. I usually grab these from my local farmer’s market because, honestly, fresh is best. But hey, grocery store finds work just as well!
- 12 large eggs (the fresher, the better for peeling)
- 1/2 cup mayonnaise (I’m a sucker for the one with the olive oil)
- 2 teaspoons white vinegar
- 1 teaspoon yellow mustard (Dijon works in a pinch)
- 1/4 teaspoon salt
- Black pepper to taste
- Paprika for garnish
- Fresh herbs (like dill or parsley, for that pop of color)
Instructions
Alright, here comes the fun part. Don’t stress, though—I’ve messed this up enough times to know how to guide you through it.
- Start by gently placing your eggs in a single layer in a pot and cover them with enough water so there’s about an inch above the eggs. Add a pinch of salt—it helps with peeling later.
- Bring the water to a boil, then reduce the heat and let them simmer for 1 minute. After that, remove the pot from the heat, cover it, and let it stand for about 12 minutes.
- While the eggs are sitting, prepare an ice bath. When the eggs are done, transfer them to the ice bath to cool for at least 5 minutes. (Trust me, this step is a game changer!)
- Peel the eggs under cool running water to help remove those pesky shells and rinse off any little bits left behind.
- Cut each egg in half lengthwise, and gently pop out the yolks into a bowl. Place the whites on a beautiful serving platter as you go.
- Mash the yolks with a fork and stir in the mayonnaise, vinegar, mustard, salt, and pepper until smooth and creamy.
- Here’s where you can get fancy—spoon or pipe the yolk mixture back into the hollows of the egg whites.
- Sprinkle each egg half with paprika, then garnish with those fresh herbs. Seriously, don’t skip the herbs; they’re like the Easter bonnet on these little deviled delights.
Tips & Tricks
Now, about those ingredients… Here are some tips and tricks I’ve learned along the way (some the hard way, mind you).
- If your yolks are stubbornly lumpy, pass them through a sieve or use a hand mixer to get that silky texture.
- For a healthier twist, substitute half the mayo with Greek yogurt. You’ll hardly notice the difference, and it’ll cut down on the calories.
- Want to add a little kick? Mix in a bit of hot sauce or a dash of cayenne pepper to the yolk mix.
- Don’t have a piping bag? A zip-top bag with the corner snipped off works just as well for filling those egg whites.
FAQ
Got questions? I’ve got answers (and I’ve probably asked the same ones at some point).
Q: How long can I store deviled eggs?
A: You can keep deviled eggs refrigerated for up to two days. Just make sure to cover them tightly with plastic wrap or in an airtight container.
Q: Can I make deviled eggs ahead of time?
A: Absolutely! Prepare the eggs and filling, but store them separately. Fill the egg whites just before serving to keep everything looking and tasting fresh.
Q: What’s the best way to peel hard-boiled eggs?
A: Start peeling from the bottom, wider end where there’s an air pocket. Also, peeling them under running water or in a bowl of water helps the shells come off more easily.
There’s a certain charm that comes with making deviled eggs for Easter. It’s a recipe filled with tradition, shared at family gatherings, and a vibrant reminder of spring’s arrival. In my family, the colorful garnishes symbolize the blossoming flowers, and the gathering around the table reminds us of the togetherness the holiday celebrates.

So, as you bite into these delectable Easter Deviled Eggs, remember that it’s not just about the perfect balance of creamy yolk filling and the satisfying snap of the firm whites—it’s about the memories you create and the smiles you share. Whether you’re trying this recipe for the first time or it’s a staple at your Easter feast, may it bring a little extra joy to your holiday table. Happy Easter, everyone!
Troubleshooting
Let’s face it, even with the best-laid plans, sometimes things can go awry in the kitchen. Here are a few common deviled egg dilemmas and how to fix them:
- If your egg whites tear while peeling, don’t fret. Just patch it as best you can and cover with the yolk filling. Once garnished, no one will be the wiser.
- Got runny filling? It could be from over-measuring your mayo or mustard. Try adding a couple more yolks to the mix to thicken it up.
- Yolk filling too thick? A tiny splash of pickle juice or a bit more mayo can loosen it up without altering the flavor too much.
Storage Tips
Deviled eggs are best enjoyed fresh, but if you’ve got leftovers or you’re prepping ahead, here’s how to keep them tasty:
- Place the filled eggs on a plate and cover them with damp paper towels before wrapping the plate tightly in plastic wrap. This helps maintain moisture and prevents them from absorbing odors from the fridge.
- Store the hard-boiled egg whites and the yolk filling separately if you’re prepping a day in advance. Fill them close to serving time to keep everything fresh.
- For longer storage, you can freeze the cooked egg whites, but be warned, the texture might change. The yolk filling, however, does not freeze well.
Variations
There’s no end to the ways you can jazz up this classic recipe. Here are some fun variations to try:
- For a Mediterranean twist, add chopped olives, sun-dried tomatoes, and feta to the yolk mix.
- Give it a Southwest kick with some minced jalapeño, cilantro, and a pinch of chili powder.
- Go fancy with smoked salmon, capers, and a sprinkle of dill for a brunch-worthy treat.
- Make it sweet and spicy with a little bit of honey and Sriracha.
A Bit of Egg History
Deviled eggs have a special place in my heart, but they also have a rich history. The term “deviled” dates back to the 18th century and referred to spicy or zesty food, which included these stuffed eggs. They’ve been a staple at picnics and potlucks for generations, but Easter deviled eggs? That’s a tradition that speaks to rebirth and new beginnings, with eggs symbolizing fertility and renewal long before they became associated with Christian traditions.
In my family, we love adding a personal touch, like a sprinkle of paprika passed down from my grandmother’s Hungarian roots or a dash of curry powder for an Indian flair, honoring the diversity in our family tree. It’s a way to bring our ancestors to the table, so to speak, and celebrate our cultural heritage through food.
Conclusion
Whew! There you have it, folks—my ultimate guide to creating the perfect Easter Deviled Eggs. Remember, the secret ingredient is always love (and a dash of patience). Don’t be discouraged by the occasional kitchen mishap. Laugh it off, learn from it, and keep cooking. Easter is a time of joy and renewal, and what better way to celebrate than with a dish that brings everyone together?
So, gather your ingredients, boil those eggs, and get ready for the oohs and aahs as you set down your platter of beautifully crafted deviled eggs. Trust me, it’ll be worth it when you see the smiles on your loved ones’ faces. And don’t forget to have fun with it—cooking is an adventure, after all. Happy Easter, and happy cooking!