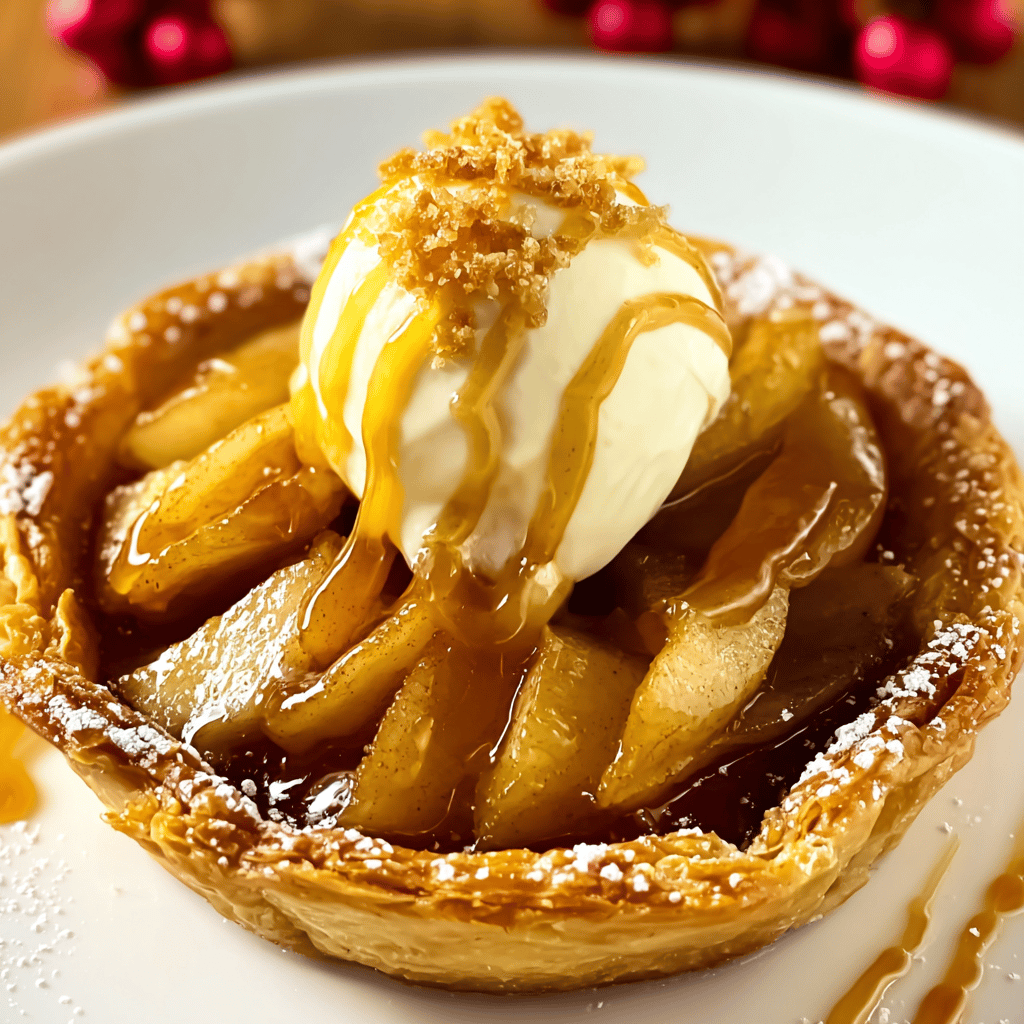
Irresistible Mini Apple Galette Bites for Cozy Gatherings
You know what? There’s a special kind of magic in miniaturizing food. It’s like you’re giving everyone their own little world of flavor. I still remember the first time I decided to shrink my grandmother’s classic apple galette recipe. Picture this: a bustling family reunion, and I’m there in the kitchen, surrounded by cousins and aunts, nervously trying to impress everyone with these tiny, adorable pastry bites. Let’s just say, my first attempt was more “rustic” than “irresistible.” The apples were cut too thick, the pastry wasn’t quite right, but hey, I learned a lot (and got some good-hearted teasing from my uncle Joe). Now, these mini apple galette bites are a favorite at every gathering, and honestly, they’re just perfect for cozying up with loved ones and sharing stories.
Before we dive into the warmth and sweetness of these delightful pastries, let’s take a quick look at what we have in store. You’ll find that once you’ve got your ingredients and instructions down, the rest is a piece of cake… or, well, a piece of galette!
Table of Contents
Ingredients
Every great recipe starts with simple, high-quality ingredients. Here’s what you’ll need for these bite-sized wonders:
- 1 package (about 14.1 oz) of refrigerated pie dough (or homemade if you’re feeling extra ambitious)
- 2 large apples, peeled and thinly sliced (I swear by Honeycrisp for that perfect sweet-tart balance)
- 1/4 cup granulated sugar, plus a little extra for sprinkling on top
- 1 teaspoon ground cinnamon
- 1/8 teaspoon ground nutmeg
- A pinch of salt
- 1 tablespoon all-purpose flour, plus more for dusting your work surface
- 1 egg, beaten (for that golden, shiny finish)
- Optional: A scoop of vanilla ice cream or a drizzle of caramel sauce for serving
Instructions
Now, let’s get to the fun part. Follow these steps, and you’ll be the star of your next cozy gathering:
- Preheat your oven to 375°F (190°C) and line a baking sheet with parchment paper to save yourself from a sticky situation later on.
- On a lightly floured surface, roll out the pie dough and use a cookie cutter or the rim of a glass to cut out circles. Place them on the prepared baking sheet.
- In a mixing bowl, toss together the thinly sliced apples, sugar, cinnamon, nutmeg, salt, and flour until the apples are well-coated.
- Arrange apple slices on the dough circles, leaving a small border around the edge. Fold the edges over the apples, pleating as you go for that charming, rustic look.
- Brush the edges of the dough with the beaten egg and sprinkle a little sugar on top because, let’s face it, a little extra sweetness never hurt.
- Bake for 20-25 minutes or until the galettes are golden and bubbly. Trust me, that smell wafting through your kitchen will be heavenly.
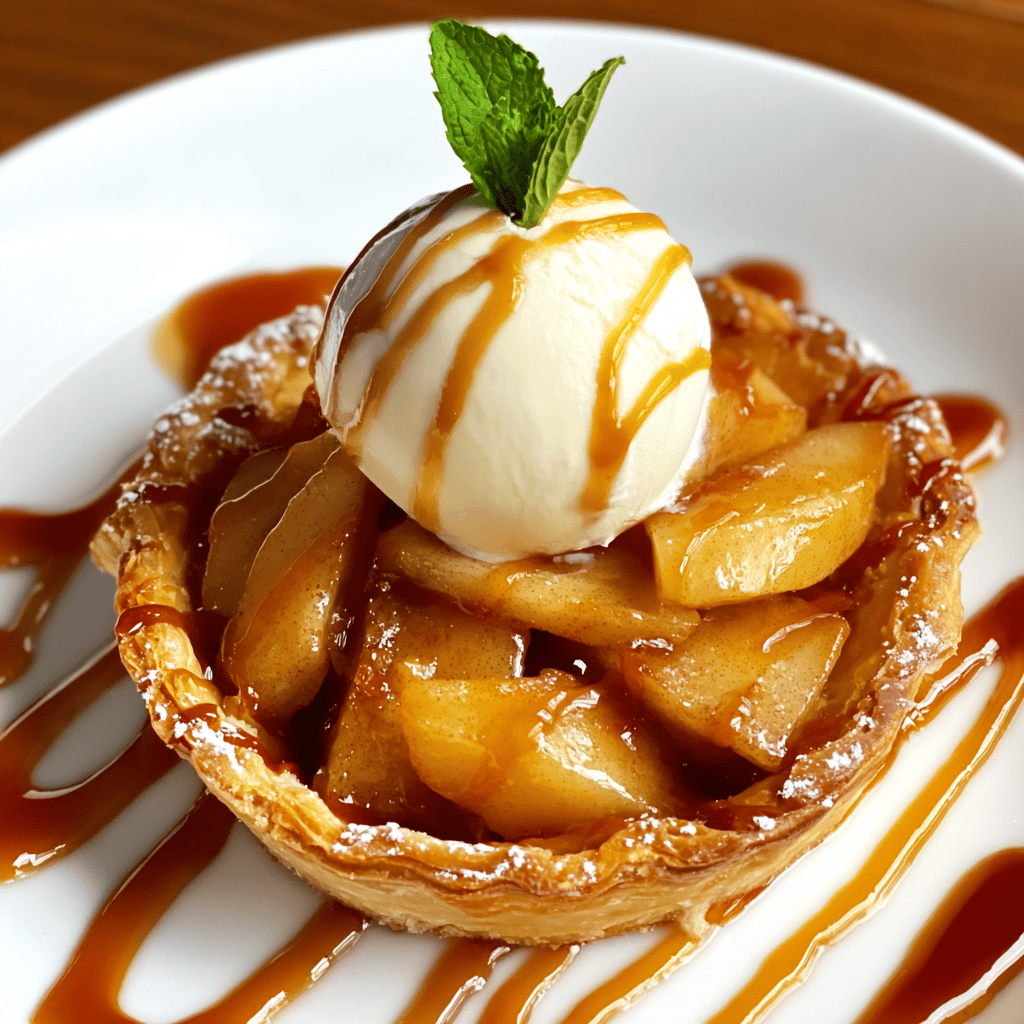
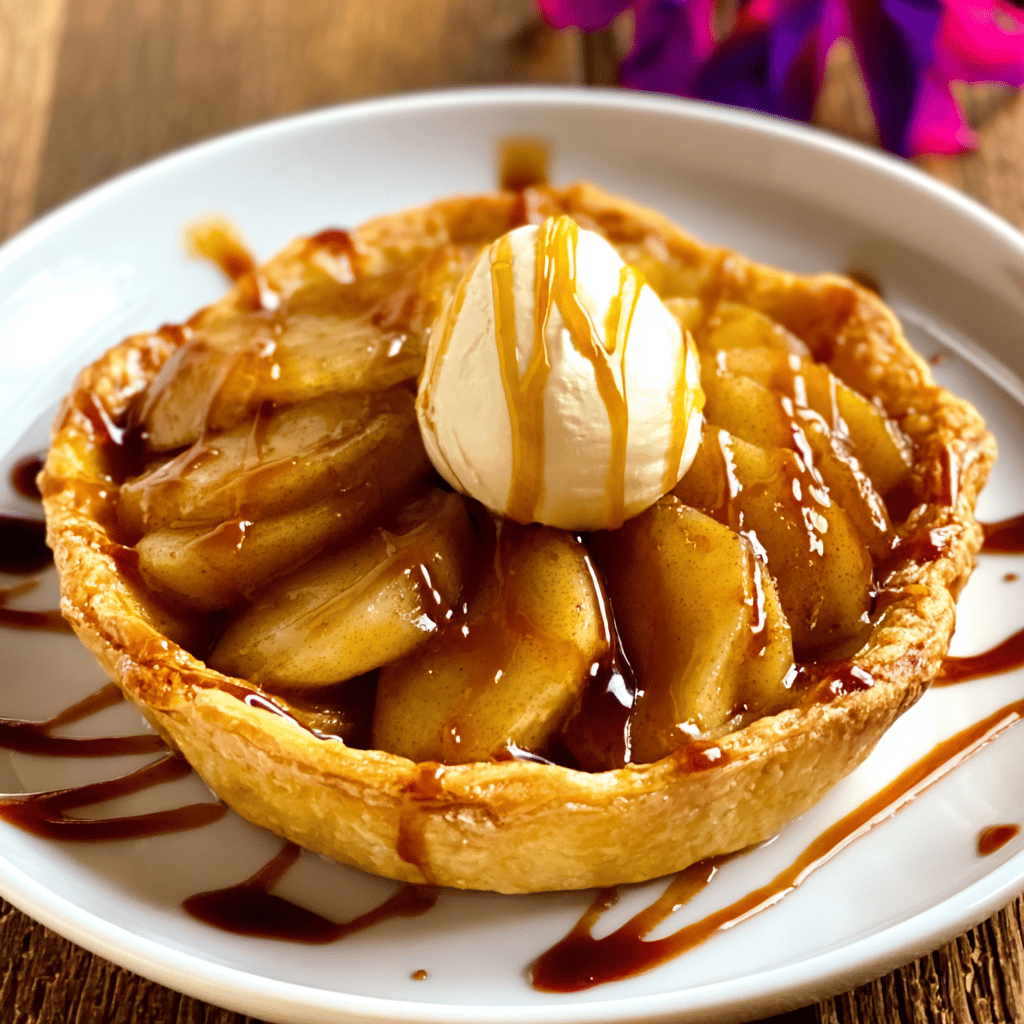
- Let them cool slightly before serving. They’re fantastic on their own, but if you want to go all out, add that scoop of ice cream or drizzle of caramel. Divine!
Tips & Tricks
Here are some nuggets of wisdom I’ve picked up along the way (often learned the hard way):
- If you’re short on time, store-bought pie dough is a lifesaver. But honestly, if you can make it from scratch, it’s a game changer!
- Thinly slicing the apples ensures they’ll cook evenly and get that perfect tender-but-not-mushy texture.
- Don’t skip the egg wash; it gives a beautiful sheen and helps the sugar stick for a slightly caramelized edge.
And speaking of substitutions, if you don’t have ground nutmeg on hand, a little allspice or extra cinnamon can step in. I once used lemon zest when I ran out of cinnamon, and it was surprisingly refreshing! But here’s a tip: stick with the nutmeg if you can – it adds a warm depth that just screams autumn.
FAQ
Q: Can I use different types of apples for this recipe?
A: Absolutely! Feel free to experiment with your favorite apple varieties. Just keep in mind that some apples bake better than others. Granny Smith works great if you like a tart kick.
Q: How many calories are in each mini galette bite?
A: It varies, but they’re roughly about 150-200 calories each, depending on the size and your toppings. Moderation is key (but they’re so good, it’s tough, I know).
Q: What’s the best way to store these if I have leftovers?
A: Store them in an airtight container at room temperature for up to 2 days. But honestly, leftovers are a rarity with these delights.
There’s not just a recipe here, but a cultural story woven into each flaky layer. These mini apple galette bites carry the essence of family, the comfort of home, and the joy of sharing. My mom always said, “Food is love,” and I can’t help but agree when I see the smiles these little pastries bring.
So whether you’re hosting a fall get-together, looking for a sweet treat to accompany your coffee, or simply want to wrap yourself in the coziness of baked apples and cinnamon, these mini apple galette bites are just the ticket. Remember, the beauty lies in the imperfection of each unique galette, so embrace the quirks and enjoy the process. (And if your first batch comes out looking like mine did, laugh it off and know you’re in good company.)
Troubleshooting
Let’s be real, sometimes things don’t go as planned in the kitchen. Here are some common pitfalls and how to dodge them:
- If the pastry is too crumbly and won’t hold together, it might be too dry. Try sprinkling a bit of ice water over it and gently kneading it back to life.
- When the apples turn out too crunchy, it likely means they weren’t sliced thin enough or the galettes needed more time in the oven. Thin, uniform slices and patience are key.
- If the edges of your galettes are burning, your oven might run hot. Try lowering the temperature a tad and keep an eye on them. Every oven has its quirks!
(I once forgot the sugar on top, and while they were still delicious, they just didn’t have that special sparkle. So don’t forget the sugar sprinkle!)
Storage Tips
Assuming you have leftovers (which, if you’re anything like me, is a big assumption), you’ll want to keep those galette bites tasting fresh. Here’s how:
- First off, make sure they’re completely cool before storing. Warm pastries can create condensation and, well, sogginess ensues.
- Store them in an airtight container with a piece of parchment paper between layers to prevent sticking.
- If you’re all about that oven-fresh taste, reheat them for a few minutes at 350°F before serving again. It’s almost like a little oven spa for your pastries.
(And a word to the wise: don’t store them with very aromatic foods. Unless you fancy apple galette with a hint of garlic, that is.)
Cooking Tips
Let me share a couple of insider tips to elevate these bites from great to out-of-this-world:
- When arranging the apple slices, try to keep them from overlapping too much. This will help them cook more evenly and give you that perfect bite.
- Consider adding a sprinkle of coarse sugar on the crust for an extra crunch. It’s a small touch that adds texture and makes your galettes feel like they came straight from a bakery.
(I’ve also been known to add a pinch of cardamom to the apple mix for a little unexpected twist. Shh, don’t tell Grandma!)
Substitutions
Substitutions can be a savior, especially when you’re mid-recipe and realize you’re out of something. Here are some swap-outs that have saved my skin:
- No pie dough? Puff pastry can work in a pinch. It’s flakier and will give you a different texture, but it’s still scrumptious.
- Ran out of granulated sugar? Brown sugar can add a deeper, caramel-like flavor to your galettes.
- For a dairy-free or vegan version, use a plant-based butter in your homemade dough, and swap the egg wash for a plant-based milk wash.
(One time, I even used peach slices instead of apples, and it was a total hit. Just keep an eye on the baking time, as peaches can cook faster.)
Calories
Now, I’m usually not one to count, but it’s good to have an idea of what you’re indulging in. Each mini galette bite is around 150-200 calories. This can vary based on your dough (store-bought vs. homemade) and toppings. Remember, it’s all about balance, and these little gems are worth every delicious calorie.
Conclusion
There you have it, my fellow home cooks and pastry enthusiasts – the ultimate guide to creating Irresistible Mini Apple Galette Bites for your next cozy gathering. From the aroma that fills your kitchen to the last crumbly, buttery bite, these little pastries are sure to warm hearts and bring smiles. They’re a testament to the power of food to bring us together, create memories, and, of course, satisfy our sweet cravings.
So roll up your sleeves, flour your counters, and get ready to impress with these mini marvels. And remember, the most important ingredient is always love. Happy baking!